Little City Kitchen Co. Blog

My stories about local food, fermentation, and formerly organic baby food
Join Newsletter
Receive Blog and Class Updates

The Changes Keep on Coming: The Next Chapter for Little City Kitchen

You may have noticed the radio silence over the last few weeks.  The last four weeks have been monumental for me.  First came the announcement that Little City Kitchen Co. will stop producing baby food.  And now the next bit of big news that may come as a disappointment to some: I’ve decided to stop baby food altogether, which includes the education and cooking class components.

It all began three weeks ago with a potential publishing deal.  After the decision to get out of the kitchen, I moved the idea of writing a cookbook to the front of my mind and started researching my options.  Readers & customers had been asking for a cookbook for a while, and considering all the blogging I had already done, and the 60+ recipes I had already developed, publishing was an obvious next step.

I was introduced to No Limit Publishing through a trusted friend.  They’re a unique & innovative middle step between self-publishing and a full service publishing house. After several phone conversations with their Editor-in-Chief, I found myself staring at a six-page legal agreement that, if signed, would be my first step towards being a published author.  Yipee!

I called them on a Friday evening, gave them a verbal “yes”, and went home to sign the contract.

Then – an interesting thing happened.  I stared at the unsigned contract on my desk for the entire weekend.  Every time I would pick it up to sign, my entire body would rebel.  Literally, it would recoil. Those who know me well know that I’d never give a verbal agreement without intending to move forward, so what the heck was going on?

I originally thought that my disconnect with baby food came from the making of it (hence my decision to stop production), but what I realized in that moment was that baby food industry didn’t feel like the right path to me anymore.  I could no longer see myself being a baby food educator in the future, so why would I commit to writing a cookbook that took me further in that direction?

So while that revelation may seem sudden and shocking to some, I know in my heart of hearts that it’s the right one for me now.

My long-time readers are used to me sharing changes without having worked out all the logistical details, and this is certainly no different.  I have not decided what this means for the Little City Kitchen Co. brand per se, but it does mean that moving forward, we’re no longer going to be a baby food company.

And on a side note…I DID end up signing a publishing agreement, but not for a baby food cookbook!  Read on for more details…

Existing Customers…Still Interested in Baby Food?

If you are still interested in ordering baby food, there are two great businesses that I am recommending, and both are offering 20% off the first order to all Little City customers:


Big Dipper Baby Food offers in-store pickup in Bernal Heights, delivery options & a few store locations including Three Stone Hearth in the East Bay.  They offer lots of nutrient dense foods such as duck liver and beef marrow, blended with fresh fruits, veggies & spices to make them easy for the kiddos to enjoy.  Flavors are listed here.


Fresh Baby Bites offers a CSA-style delivery of fresh baby food weekly. They have 3 different kinds of baby food: Simple Purees, Spiced Up, and Spices & Grains depending on the texture your little one prefers.  Their recent menu is listed here.

I will be sending existing customers a separate email with more details on both companies and how to redeem your 20% off discounts.  And if you purchased a gift certificate for baby food or a cooking class that hasn’t been redeemed, please email me and I will issue you a full refund.


Jill Epner is a recovering food entrepreneur, advocate for early-stage food startups, and Bay Area food blogger. Follow her on Facebook, or sign up to receive her newsletter where she gives a candid peek  into the world of starting her own food company, Little City Kitchen Co.

Top 5 Reasons Why You Should Make Your Own Baby Food: Scoop on Starting Solids Blog Series by Little City Kitchen Co.

People always ask why I bother teaching parents how to make their own baby food when I’m selling my own.  My answer is always the same: whether they buy some from me, or make their own, the goal is getting kids to eat more “real” food.  I feel there is a (very big) difference between roasting & pureeing your own sweet potatoes and buying them in a jar that is shelf stable for two years.  I don’t think they qualify as sweet potatoes anymore.  So here’s why you should consider making your own…

Reason #5) Teach baby to like a variety of flavors

Here is your opportunity (your first and one of the best) to expose baby to a variety of flavors that will set the stage for a lifetime of healthy food choices.  Pack as many flavors, spices, and textures you can into the first few months.  Take advantage of this stage, because it starts to diminish the moment they start walking.  For more on this, check out: How to Grow a Broccoli Lover.

Reason #4) Better control what baby eats

There is no better way to know where you food comes from than when you make your own.  (I don’t know who grew those peaches in a jar?). Chose organic food whenever possible (see the Dirty Dozen) and support your local farmers if that’s an option in your area.  We live in a toxic world, so if you have access to good, clean food for your baby, then everyone wins.

Reason #3) Taste varieties that aren’t available on the shelf

I don’t know about you, but I’ve never seen baby food with roasted kohlrabi, blood oranges or Chioggia beets on the supermarket shelves before.  Whether you’re in the Bay Area or not, hopefully have access to heirloom varieties of foods that you can introduce to baby, and most likely these are not foods available in any pouch or jar.  And if you refer to reason #5, you’ll understand why it’s so critical to introduce them to so many flavors from the beginning.

Reason #2) Teach your kids what food should taste like

There’s something a little unnatural about the baby foods on the shelves.  The flavors are bland, the colors are muted, and the texture is super (super) smooth.  The bright flavors are lost during the high-heat processing method or from sitting on the grocery shelf for extended periods of time.  Set up your own baby food tasting experiment.  Sauté up some carrots and compare them to three different jarred varieties.  Which one tastes more like a real carrot?  This is your chance to teach kids what real food should taste like.

Reason #1) Re-establish a connection to food

I’ve saved the most important reason (from my perspective at least) for last.  As a culture, we’ve lost our connection to food.  Most people think food comes from the grocery store and have no concept of how it came to be there.  Take this opportunity to involve baby in the whole process: have them watch you roast sweet potatoes, smear it all over their face so they can taste the flavor, give them a cooked chunk to squish in their hands, and do anything to involve them in the process of transforming raw ingredients into their food.  Take this time to teach them that real food something to appreciate.

You’ll see from this list that nowhere have I mentioned saving money.  Some companies have taken the position that making your own baby food is less expensive, and while that may be the case with some ingredients, most parents I speak with aren’t drawn to making their own baby food for that reason.

They just want to feed their kids the healthiest food possible, and on some level, they know the answer doesn’t come from a jar.

Interested in reading more?  Check out a Few of My Favorite Posts which has information on best baby food equipment, making your own grain cereals, healthy fats for babies, and more…

Jill Epner is the owner of Little City Kitchen Co. is a Bay Area company making handcrafted, organic, frozen baby food with an International twist.  Follow us on Facebook, or sign up to receive our newsletter with information on starting solids & making your own baby food.

Common Mistakes with Homemade Baby Food…and How to Avoid Them

There is a lot to worry about when you’re a new mom or dad, and even more so once you enter the great big world of “what am I going to feed the little one”. If you’ve made the choice to make your own baby food, there seems to be a whole other set of concerns that parents experience: What equipment do I need, what foods should I use, how do I store it, etc…

After a year of making baby food nearly ever week as Little City Kitchen Co. has grown, I feel like I’ve learned a lot of shortcuts and tips along the way. So here are some of the most common mistakes one can make as they embark on homemade baby food, and some suggestions on how to avoid making them.

Mistake #1) Buying expensive specialty equipment:

So you’ve been eyeing the $150 Babycook at Williams-Sonoma or any of the other cook & puree baby food appliances. In general, I’m not a fan of buying any piece of equipment that only serves one purpose (especially one that you’re not going to need after six months of use). If you were ready to spend $150 for the Babycook, consider adding $100 more and buying a food processor that you’ll use for the next 15 years.

Those baby food makers have one thing in common: they steam and puree the food. Which brings me to my next mistake…

Mistake #2) Thinking you have to steam everything

You’ve heard me say it several times before, and I’ll keep saying it…There’s a whole world outside of steaming baby food! Remember what I said in a past blog about flavorful cooking methods. I do a ton of roasting, sautéing and braising, so don’t forget about these other cooking methods to get lots of flavor into the baby food.

Mistake #3) Waiting to stock up on the basics

One of the biggest joys for me is to hear how inspired people get after taking one of my baby food cooking demos. But…then they have to spend the day buying a few supplies that I recommend (I’m working on a solution for that by the way, so stay tuned).

There are some things you can buy ahead of time (say when the little one is between 3 and 4 months old) that you’ll need:

  1. Cans of Native Forest Classic Coconut Milk
  2. Either Ice cube trays or 4 oz glass Ball canning jars
  3. Different kinds of whole grains (black rice, quinoa, farro, etc…)
  4. $20.00 coffee grinder if making your own baby cereals is on your list
  5. Various dried herbs and spices, maybe 2 tablespoons of each

Mistake #4) Cooking separate food for baby

I always tell people, the time consuming part of making your own baby food is the cooking of it, not the making of it. If you want to spend a couple hours in the kitchen making special food for baby, then that’s fine, but there’s a better way.

I recommend that you incorporate cooking for baby into your normal family cooking. Within the first couple of months of eating, they can and should be eating just about everything you do, so just hold the salt and puree it up. Roast up four sweet potatoes: two for your dinner, two for baby food. Sautee up zucchini and onions with olive oil and parmesan cheese: half for your dinner, half for baby food. This will not only save you time, but (hopefully) it will also encourage you to continue cooking healthy family meals.

Interested in More?

If you’re interested in reading more about making your own baby food, check out a few of my favorite posts for information on baby food storage containers, cooking methods, equipment reviews and more…

Happy cooking!

Jill Epner is the owner of Little City Kitchen Co. is a Bay Area company making handcrafted, organic, frozen baby food with an International twist.  Follow us on Facebook, or sign up to receive our newsletter with information on starting solids & making your own baby food.

Getting to the Root of the Recipe: Baby Food Flavors for Fall

In this blog, we talk about all things baby food; making it, storing it, the health of it, etc…  But the one area I’ve been reluctant to share is actual baby food recipes. Call it “trade secrets” or my entrepreneur protectiveness kicking in, but you normally don’t get specifics from me unless you take one of my cooking classes or attend a cooking demo.

People ask why I bother with teaching baby food making classes.  Seems contradictory since I want to sell them my own baby food, right?  I’m equally as (if not more) passionate about teaching & educating parents about healthy baby food as I am about producing my own.

So in that spirit, today’s blog is going to all about baby food ideas inspired by the fabulous fall flavors, and root vegetables in particular…  And hint hint, these can also be used for your own family dinners, just cook extra and reserve some for baby food.

The Scoop on Root Vegetables

Although I can’t stand the cold weather (one reason I moved to the Bay Area from Boston), I do love soup & stew season.  And a large component of any stew of mine is root vegetables. They’re earthy, hearty, packed with good nutrients, are super-easy to cook with…and they make excellent baby food!

My Favorites:  Golden beets, Tokyo turnips, purple kohlrabi and celery root
Other great options: Parsnips, sunchokes, rutabagas, and watermelon radish
Recommended cooking: Either roast in the oven or sauté on the stovetop for best flavor

The Root of Roasting:

  • Preheat oven to 350 degrees
  • Peel root veggies, chop into ¾ – 1 inch pieces
  • Toss with either olive oil or melted coconut oil, and add any herb or spice
  • Spread in a single layer on a cookie sheet (not crowded) – I like to put aluminum foil or parchment paper on the bottom for easier cleanup
  • Roast in oven for 45-60 minutes, stirring every 10-15 minutes
  • They should be slightly browned and soft when finished.  If they get too brown, turn the oven down 25 degrees.  If they start to get dry, add more fat like olive oil.

The Root of Sautéing:

  • Peel root veggies, chop into ½ inch pieces.
  • In a large skillet (10 inch or 12 inches) over medium heat, heat up enough olive oil or coconut oil to coat the bottom of the pan, approx 2-3 tablespoons.  (Be liberal; remember babies need lots of healthy fat).
  • Add root veggies and sauté for 10-15 minutes, stirring every 2-3 minutes.
  • They should be slightly browned and soft when finished.  If they start to burn, turn the burner down. If they start to stick, add more fat.

For baby food, consider mixing some of the stronger root vegetables (like beet, celery root, parsnip) with milder and sweeter options (like sweet potato, kohlrabi, baby turnips or sunchokes).  It’s a good way to balance out the strong earthy flavor, and the kiddos seem to really like it.

Fun Fall Flavors

And finally, here are some recipe ideas you can play around with…baby food or a side dish for your family dinner, take your pick.

  • Roasted golden beet with apple, ginger & fresh parsley
  • Sautéed celery root & fennel with coconut milk, white sweet potato & cinnamon
  • Roasted parsnips with sweet potato, pear & fresh thyme
  • Homemade spiced pear sauce with coconut quinoa & clove (see baby cereals)
  • Roasted butternut squash with carrots, sautéed turnips and a hint of maple syrup

Happy cooking!

A Few of My Favorite Posts

Being a one-man show has its advantages…but not this week.  When you’re the “do-it-all” person and you come down with a stomach bug, your progress comes to a screeching halt.  On the road to recovery now, but suffice it say I haven’t been in the kitchen cooking at all, nor have I been feeling my most creative…which tends to put a damper on my writing.

So forgive me for cheating a little bit this week, but in lieu of our normal blog (and because we have a ton of new readers) I thought I’d assemble some of my favorite blog posts over the year to share with you.

Making Your Own Baby Food

So your little one is 5 months old and you’re getting ready to start solids.  Congratulations!  You want to make your own food, but where do you start?

First, checkout my review of baby food making equipment.  My favorite piece of equipment is the food processor, but if you don’t have one of those on hand, here are some alternatives that work well.

Next, learn all about my favorite cooking methods here.  People think that baby food can only be steamed, but there’s a whole world of roasting, sautéing and other methods to bring out the best flavors for little one.

You probably know that I’m not a fan of boxed rice cereal being a first food for baby.  Homemade grain cereals, however, can be a wonderful addition to baby’s diet, so check out my guide to making your own baby cereals here.

And finally, once you’ve made all this great stuff, how do you store it?  Read all about the best baby food storage containers here.  I have a “Best Buy” and a “Wanna Splurge” item in each category.

Scoop on Starting Solids

One of the most exciting parts of starting Little City Kitchen Co. is that I spend a lot of time educating parents.  I started my Scoop on Starting Solids blog series to help the many questions that I get asked.  The questions are answered by my favorite pediatrician, Julia Getzelman, or another expert in the field.

A lot has changed in the baby food world in the last three years.  It started with the revised AAP guidelines that were released in 2008.  Read here to find out the newest recommendations for introducing allergens.

I use a lot of healthy fats in baby food including coconut milk, coconut oil and olive oil.  You can learn a little more about cooking with healthy fats here.

Every parent wants to raise a child that makes healthy eating choices, but most people don’t realize that they can teach food preferences from the very beginning.  Read all about how to grow a broccoli lover here.

And finally, I talk a lot about why rice cereal isn’t the best first food.  You can read a little more about that and some other suggestions for first foods here.

Enjoy the recap…we’ll be back next week with lots of new goodies to read.

A Guide to Homemade Baby Cereals: Rice, Quinoa, and other Whole Grains

It should come as no surprise to my long-time readers that I tend not to agree with the “common” American philosophies surrounding introducing solids. You’ve heard me discuss new guidelines for introducing allergens, recommend adding spices to your own baby food, and address other common myths surrounding baby food.

One myth that really bugs me is the general assumption that baby white rice cereal from a box should be little one’s first food.  Whole grains can be wonderful for baby, but instead of using the highly processed boxed varieties (with absolutely no nutrients!), today’s blog will tackle the topic of making your own whole grain baby cereals.

Iron-ic?

When I’ve asked parents why they use baby rice cereal from a box, they cite two main reasons: food allergy concerns and high iron content.

If you’ve read the 2008 revised AAP Guidelines surrounding introducing solids, you’ll see that they now recommend introducing a variety of foods in the first few months, and in no particular order.  There are better alternatives if allergies are your concern.

And on the iron front, guess what folks; the fortified iron added to boxed rice cereal is not easily absorbed by your little one, so you’re better off cooking up iron-rich foods like meats, leafy greens and red beans for your baby food.

Remember, babies need a variety of foods, so make these whole grain cereals, but blend them with fruit, veggies, and meat for optimal nutrition.  Many of the baby food recipes at Little City Kitchen Co. have a whole grain component, but it’s never the star ingredient.

Making Your Own

Making your own baby grain cereal is relatively simple and fast if you’ve done a few things to prepare.

  1. You buy a whole grain of your choice
  2. Grind it into a powder using a coffee grinder
  3. Add some liquid and cook for about 5 minutes on the stovetop

Which Whole Grains?

Get creative people!  You can use just about any whole grain that you can find to make your own baby cereal.  Find them in the bulk sections of your natural grocer.  Whole Foods usually has a good selection, but my pick is Rainbow Grocery if you’re in San Francisco.

My favorites grains to use are:

Brown rice – I use exclusively Massa Organics, but brown basmati is a great too.
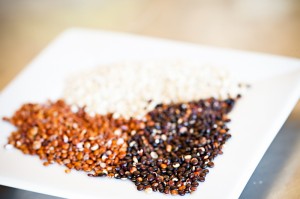
Red quinoa – a great source of protein; try toasting it in a dry skillet before grinding for even better flavor.
Black rice – I use Lotus Food’s Forbidden Rice, lots of antioxidants and a pretty lavender color.
Farro – an Italian version of spelt, very nutty and creamy

Other whole grains to consider trying: spelt, kamut, buckwheat, wheatberries, millet, amaranth, the list goes on.

The Daily Grind

Next, you need to grind the whole grain into a powder, and for that, I recommend buying an inexpensive coffee grinder.  If you wanna splurge a little, my favorite one is this one from Kitchen Aid at $35.00, but Capresso makes my value pick, a great one for only $20.00 at most Bed Bath & Beyonds.

Add ½ cup of your whole grain to the grinder and grind until you get the consistency of fine sand.  For brown rice, this can take 2-4 minutes, for softer grains like quinoa, it’s only 20-40 seconds.  Finer grind = smoother puree, so adjust according to your little one’s age and preference.

The Secret to Smooth Cereal

Most baby food recipes tell you at this point to heat up the water to boiling and just throw in the rice cereal.  I did that the first time…and it was not pretty.  The cereal formed these very unattractive lumps that were gummy and undercooked.  It’s sort of like making gravy at Thanksgiving; you can’t just throw in the flour and expect a smooth consistency.

I recommend reversing the process; chefs will know this as making a “slurry”.  Heat the water up until you can stick your finger in for only about a second (around 170 degrees, give or take).  Have your ground cereal in a separate bowl.  Pour the hot water over your ground cereal and mix thoroughly with a whisk.  Then transfer the mixture back to the stovetop and stir constantly on medium heat until it’s cooked, usually about 5-7 minutes.

Rice: Use a 1:6 ratio (1/4 cup of rice powder + 1 ½ cups of water)
Quinoa: Use a 1:3 ratio (1/4 cup of quinoa +3/4 cup of water)
Farro:  Use a 1:4 ratio (1/4 cup of farro + 1 cup of water)

Feel free jazz up baby grain cereal with ¼ cup of coconut milk, dried spices like cinnamon, nutmeg or cardamom, or a fruit puree.  You can also blend with savory ingredients like vegetables and meats.

So my parting words to you: stay away from the boxed rice cereal and get creative with whole grains.  And for the record, it’s not just for kids!  My breakfast this morning was homemade coconut quinoa cereal with peach puree, cinnamon and clove.  It was a recipe I made for the little ones, but it was too good to resist eating myself!

A Guide to Pureeing: The Best Equipment to Make Baby Food

Okay people, let’s talk equipment…that is…equipment needed to make your own organic baby food.  I have buzzed, smashed, and blended my way through hundreds of my own baby food recipes at Little City Kitchen Co., and have learned which pieces of kitchen equipment work best along the way.

Unless you plan on being a serious baby food maker, I don’t recommend going out and purchasing a bunch of expensive equipment.

The goal of this review is to talk about equipment that you hopefully already have in your home kitchen, or inexpensive things you can buy and use for other non-baby food related recipes once your little one moves beyond purees.

A few other references for those who are interested:  I recently did a review of my favorite cooking methods for baby food (it’s not just steaming!), and a review of the best baby food storage containers on the market today.

I’m going to start at the top with the “ideal” tools, and work my way down.  Don’t worry if you don’t have the top-of-the line items.  Anything on this list will work, it just may take slightly longer (and slightly more work) to prepare the baby food.

Food Processor: This is the most efficient and effective baby food-making tool a home cook can have.  I use the Kitchen Aid 12 cup food processor…and I should confess here that I own four of them.   Expect to pay $150-$200 for a good model.

Pros: Smoothest puree texture, very efficient and fast, large bowl capacity, easy to use, very versatile (I make hummus every week!)
Cons: On the expensive side, more time consuming to clean, takes up space

Blender:  Since many home cooks don’t have a food processor, I’ve found a blender is a great alternative.  I use the Kitchen Aid 5-Speed model for around $100.  You want a pretty powerful one, but if you have a cheaper model, that’s fine, it just means you may need to work a little harder.

Pros: You probably already have one, they puree relatively well
Cons: Requires a few stop/starts and a spatula to keep scraping down the sides, not quite as efficient as a food processor

Immersion blender: If you’re a fan of making pureed soups, then you may already be the proud owner of an immersion blender.  These nifty little things have a blender blade on the end of a wand that goes right into the bowl of food and liquid on your stove.  I have a Kitchen Aid immersion blender that cost me around $80.

Pros: Small appliance, super-easy cleanup, purees soft vegetables pretty well
Cons: Doesn’t work well on harder veggies, takes longer to puree than a food processor or blender

Food Mill: Think of a bowl with a colander-like bottom and a crank that pushes food through the holes.  Food mills can work well for softer, well cooked foods like applesauce, sweet potato, and butternut squash.

I have  very sturdy stainless steal one from Cuisipro for around $90, but most baby stores sell a plastic version for around $15.  Not a great piece of equipment, but it can certainly work well if you don’t have a blender.

Pros: No electricity needed, plastic ones are inexpensive, works on soft foods
Cons:  Not a very smooth consistency achieved, not extremely useful outside of baby food…unless you really like homemade applesauce!

Potato Masher: Trust me folks, everyone can make baby food!  If nothing else, you can always rely on a handy potato masher combined with a little elbow grease to make food for your kiddo.

Check out five easy and inexpensive baby food recipes using nothing but a potato masher.  My fav one is actually a “bean masher” (which I prefer over a potato masher) for a measly $2.00 from WalMart.  You can usually find them at Mexican or Hispanic food stores as well.

Pros: very inexpensive, small, easy to clean
Cons: takes time and energy to mash, don’t get a very smooth consistency

So you’ve learned how to cook baby food, what equipment is needed to puree it, and finally, how best to store it.  Now off you go into the kitchen to whip up some goodies for the little ones.  Please feel free to leave a comment with your own baby food-making experiences!!

Beyond Steaming: Flavorful Cooking Methods for Homemade Baby Food

When I sell at the farmers markets, I am always asked: how is baby food actually made? At its very core, homemade baby food is fairly simple; it’s cooked food, pureed or mashed with some liquid, and then fed to baby or frozen in containers for later

Until I started Little City Kitchen Co., I thought, like most parents, that baby food had to be prepared differently than adult food.  Many of today’s baby books tell parents that baby food should be bland (erroneously in my opinion), so therefore steaming veggies is the best method of cooking.  Steaming?  Bleh…  No flavor in that.

As a home chef, I roast, sauté, and caramelize my way through my own recipes, with the goal of extracting as much flavor as I can from each ingredient.  Why couldn’t baby food be the same?    As it turns out, it can be…

Which fats to use in baby foods?

Your little one needs fat in their diet to grow up healthy!  Use healthy fats (like olive oil, butter, and virgin coconut oil) liberally when making your own baby food.  Not only do they make the food taste great, these fats also help with brain development and immunity building. And they’re a key part in some of my favorite cooking methods.

Okay, let’s dig into my favorite cooking methods for the little ones…

Roasting

Pros: Brings out great flavors.  Cook time: 30-60 minutes average
Directions: For whole veggies: just wrap in aluminum foil “packs”, or for cut-up veggies, toss in a healthy fat such as olive or coconut oil and spread on a pan.  Cook at 350 deg.
Fav things to roast: whole veggies such as sweet potatoes & golden beets, and cut up veggies such as cauliflower, butternut squash, turnip, celery root, and tomatoes.

Sauteeing

Pros: Brings out good flavors, quick.  Cook time: 10-15 minutes average
Directions: Cut chunks of fruit or veggies in ½ inch pieces, add some fat such as butter from grass-fed cows or coconut oil, sauté over medium heat to prevent burning and cook until done.
Fav things to sauté: onions, garlic, leeks, shallots, carrots, celery, turnips, zucchini,  squash, and mushrooms.  I use all of these fragrant flavors in baby foods along with herbs and spices.

Other Cooking Methods

Steaming:  Preserves the most nutrients, but tends to be blander in flavor than roasting or sauteing.
Fav things to steam: potatoes, cauliflower, broccoli, carrots, butternut squash (pretty much anything you can roast, you can steam quicker but without as much flavor)

Boiling: Can diminish the flavor if you don’t use the liquid, cook time 5-15 minutes for veggies, nearly an hour for legumes.
Fav things to boil: lentils and beans, frozen peas, carrots and potatoes

Microwaving: Most destructive method, but the fastest and occasionally good in a pinch
Best things to microwave: cut up veggies, whole sweet or white potatoes
Hint: only use microwave at 50% power to cook food more gently and keep more nutrients.

Remember, babies love flavor in their food, so don’t be afraid to experiment with different cooking methods as you puree and mash through different recipes.  Also check out our review of baby food storage containers and adding spices to your baby food.

A Guide to Best Baby Food Storage Containers: Homemade Baby Food Tips blog series

So…you’ve started to make your own organic baby food for little one.  Congratulations!  Now the question is how do you store all this delicious food you made?  We kick of today’s Homemade Baby Food Tips blog series with a few different storage methods and a review of the best baby food containers available today.

Shout out to Nicole L. for submitting this question for the blog series!  She wins a free pack of frozen baby food for her little one.  Enter your questions here for a chance to win.

Freezing in Ice Cube Trays

Using this method, you spoon your homemade baby food into ice-cube trays, freeze it, and then transfer the cubes into a zipper-top bag.

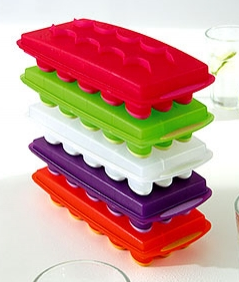
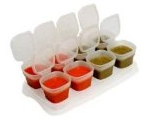
Value pick: So Easy Covered Ice Cube trays

These are similar to traditional ice cube trays, with the added benefit of a snap-on cover that protects the baby food as it freezes and allows you to stack multiple trays in your freezer. $10 for 2 trays.

Wanna Splurge: Orka Cubes

Love these…same concept as above except the bottom of the ice cube tray is made of food-grade silicone.  Instead of twisting and fighting to get the cubes out, you just press the bottom and “pop” each cube goes.  And to boot, they come in super-cool bright colors. $10-$15 each.

On-The-Go

You spoon your baby food into these containers and the whole thing gets frozen.  No transferring, just take one out of the freezer, thaw it, and take it wherever you want.

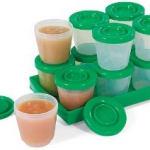
Value Pick: Fresh and Freeze

Easy to find and inexpensive.  These guys come with special trays to stack containers nicely in your freezer.  They come in a few sizes 1, 2, and 4 oz…don’t get the 1oz because your little one will outgrow in a month!  $10 for 12 containers.

Don’t Recommend: Baby Cubes

This is the only product on here that I don’t recommend buying.  Feedback is that the tops (while conveniently attached) are constantly popping off.  Green peas leaking in the diaper bag…enough said.

Food Grade Silicone

Moving up the scale, food-grade silicone is a great way to store food.  It’s safe for baby, flexible for easy removal, and is pretty much indestructible.

Value Pick: Tovolo Perfect Ice cube trays

A great silicone tray, and they form these perfect little squares of goodness.  The downside is that there is no cover, so use parchment paper or plastic wrap.  They’re easy to find in 1oz size, and a little harder to find in the 4oz larger size.  Use them also for regular ice cubes…they won’t melt for over an hour in your drink!  $8 each.

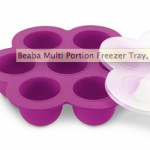
Wanna Splurge: Beaba Mulit-portion Freezer Tray

We’ve all seen them at Williams-Sonoma, and I must confess that even I lust a little after these because they’re just too cute.  Aside from the cool-factor, they’re crazy expensive so maybe it’s a great gift from mom or the in-laws! $20 each.

I’m hearing rumors that one of my fav brands Lifefactory is coming out with an individual silicone baby food storage container.  More to come on that, but something to look out for.

Freezing in Glass Containers

Even with BPA-free plastics out there, I try and use glass as much as possible.  The most important thing to remember about using glass: check to make sure your glass container is safe for the freezer…it will say on the packaging.
(Note: old baby food jars are NOT safe for the freezer, so toss them in the recycle bin and don’t be tempted to reuse).

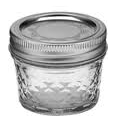
Value Pick: Ball 4oz Jelly Jars

The best kept secret…Whether your canning or not, these freezer-safe jelly jars are an excellent option to freeze baby food if glass is your preference.  I picked up a dozen for under $9.00 at my local Ace Hardware.

Wanna Splurge: Wean Cubes

My all-time fav splurge pick are these adorable glass baby food cubes from WeanGreen.  Definitely on the pricy side ($25-$30 for four, 4oz cubes), but again, what a great extravagant gift to have your mom buy!  $25 for 4 containers.

Come visit Little City Kitchen Co. at the Burlingame Farmers Market this Sunday…got some yummy flavors for the kiddos!