Little City Kitchen Co. Blog

Handcrafted, organic, frozen baby food with an International twist
Join Newsletter
Receive Blog and Class Updates
Our Website
For Selling Locations & Cooking Classes

A Guide to Pureeing: The Best Equipment to Make Baby Food

Okay people, let’s talk equipment…that is…equipment needed to make your own organic baby food.  I have buzzed, smashed, and blended my way through hundreds of my own baby food recipes at Little City Kitchen Co., and have learned which pieces of kitchen equipment work best along the way.

Unless you plan on being a serious baby food maker, I don’t recommend going out and purchasing a bunch of expensive equipment.

The goal of this review is to talk about equipment that you hopefully already have in your home kitchen, or inexpensive things you can buy and use for other non-baby food related recipes once your little one moves beyond purees.

A few other references for those who are interested:  I recently did a review of my favorite cooking methods for baby food (it’s not just steaming!), and a review of the best baby food storage containers on the market today.

I’m going to start at the top with the “ideal” tools, and work my way down.  Don’t worry if you don’t have the top-of-the line items.  Anything on this list will work, it just may take slightly longer (and slightly more work) to prepare the baby food.

Food Processor: This is the most efficient and effective baby food-making tool a home cook can have.  I use the Kitchen Aid 12 cup food processor…and I should confess here that I own four of them.   Expect to pay $150-$200 for a good model.

Pros: Smoothest puree texture, very efficient and fast, large bowl capacity, easy to use, very versatile (I make hummus every week!)
Cons: On the expensive side, more time consuming to clean, takes up space

Blender:  Since many home cooks don’t have a food processor, I’ve found a blender is a great alternative.  I use the Kitchen Aid 5-Speed model for around $100.  You want a pretty powerful one, but if you have a cheaper model, that’s fine, it just means you may need to work a little harder.

Pros: You probably already have one, they puree relatively well
Cons: Requires a few stop/starts and a spatula to keep scraping down the sides, not quite as efficient as a food processor

Immersion blender: If you’re a fan of making pureed soups, then you may already be the proud owner of an immersion blender.  These nifty little things have a blender blade on the end of a wand that goes right into the bowl of food and liquid on your stove.  I have a Kitchen Aid immersion blender that cost me around $80.

Pros: Small appliance, super-easy cleanup, purees soft vegetables pretty well
Cons: Doesn’t work well on harder veggies, takes longer to puree than a food processor or blender

Food Mill: Think of a bowl with a colander-like bottom and a crank that pushes food through the holes.  Food mills can work well for softer, well cooked foods like applesauce, sweet potato, and butternut squash.

I have  very sturdy stainless steal one from Cuisipro for around $90, but most baby stores sell a plastic version for around $15.  Not a great piece of equipment, but it can certainly work well if you don’t have a blender.

Pros: No electricity needed, plastic ones are inexpensive, works on soft foods
Cons:  Not a very smooth consistency achieved, not extremely useful outside of baby food…unless you really like homemade applesauce!

Potato Masher: Trust me folks, everyone can make baby food!  If nothing else, you can always rely on a handy potato masher combined with a little elbow grease to make food for your kiddo.

Check out five easy and inexpensive baby food recipes using nothing but a potato masher.  My fav one is actually a “bean masher” (which I prefer over a potato masher) for a measly $2.00 from WalMart.  You can usually find them at Mexican or Hispanic food stores as well.

Pros: very inexpensive, small, easy to clean
Cons: takes time and energy to mash, don’t get a very smooth consistency

So you’ve learned how to cook baby food, what equipment is needed to puree it, and finally, how best to store it.  Now off you go into the kitchen to whip up some goodies for the little ones.  Please feel free to leave a comment with your own baby food-making experiences!!

Beyond Steaming: Flavorful Cooking Methods for Homemade Baby Food

When I sell at the farmers markets, I am always asked: how is baby food actually made? At its very core, homemade baby food is fairly simple; it’s cooked food, pureed or mashed with some liquid, and then fed to baby or frozen in containers for later

Until I started Little City Kitchen Co., I thought, like most parents, that baby food had to be prepared differently than adult food.  Many of today’s baby books tell parents that baby food should be bland (erroneously in my opinion), so therefore steaming veggies is the best method of cooking.  Steaming?  Bleh…  No flavor in that.

As a home chef, I roast, sauté, and caramelize my way through my own recipes, with the goal of extracting as much flavor as I can from each ingredient.  Why couldn’t baby food be the same?    As it turns out, it can be…

Which fats to use in baby foods?

Your little one needs fat in their diet to grow up healthy!  Use healthy fats (like olive oil, butter, and virgin coconut oil) liberally when making your own baby food.  Not only do they make the food taste great, these fats also help with brain development and immunity building. And they’re a key part in some of my favorite cooking methods.

Okay, let’s dig into my favorite cooking methods for the little ones…

Roasting

Pros: Brings out great flavors.  Cook time: 30-60 minutes average
Directions: For whole veggies: just wrap in aluminum foil “packs”, or for cut-up veggies, toss in a healthy fat such as olive or coconut oil and spread on a pan.  Cook at 350 deg.
Fav things to roast: whole veggies such as sweet potatoes & golden beets, and cut up veggies such as cauliflower, butternut squash, turnip, celery root, and tomatoes.

Sauteeing

Pros: Brings out good flavors, quick.  Cook time: 10-15 minutes average
Directions: Cut chunks of fruit or veggies in ½ inch pieces, add some fat such as butter from grass-fed cows or coconut oil, sauté over medium heat to prevent burning and cook until done.
Fav things to sauté: onions, garlic, leeks, shallots, carrots, celery, turnips, zucchini,  squash, and mushrooms.  I use all of these fragrant flavors in baby foods along with herbs and spices.

Other Cooking Methods

Steaming:  Preserves the most nutrients, but tends to be blander in flavor than roasting or sauteing.
Fav things to steam: potatoes, cauliflower, broccoli, carrots, butternut squash (pretty much anything you can roast, you can steam quicker but without as much flavor)

Boiling: Can diminish the flavor if you don’t use the liquid, cook time 5-15 minutes for veggies, nearly an hour for legumes.
Fav things to boil: lentils and beans, frozen peas, carrots and potatoes

Microwaving: Most destructive method, but the fastest and occasionally good in a pinch
Best things to microwave: cut up veggies, whole sweet or white potatoes
Hint: only use microwave at 50% power to cook food more gently and keep more nutrients.

Remember, babies love flavor in their food, so don’t be afraid to experiment with different cooking methods as you puree and mash through different recipes.  Also check out our review of baby food storage containers and adding spices to your baby food.

A Guide to Baby Food Storage Containers: Homemade Baby Food Tips blog series

So…you’ve started to make your own organic baby food for little one.  Congratulations!  Now the question is how do you store all this delicious food you made?  We kick of today’s Homemade Baby Food Tips blog series with a few different storage methods and a review of the best baby food containers available today.

Shout out to Nicole L. for submitting this question for the blog series!  She wins a free pack of frozen baby food for her little one.  Enter your questions here for a chance to win.

Freezing in Ice Cube Trays

Using this method, you spoon your homemade baby food into ice-cube trays, freeze it, and then transfer the cubes into a zipper-top bag.

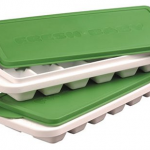
Value pick: So Easy Covered Ice Cube trays

These are similar to traditional ice cube trays, with the added benefit of a snap-on cover that protects the baby food as it freezes and allows you to stack multiple trays in your freezer. $10 for 2 trays.

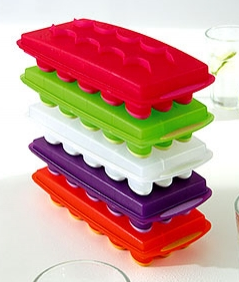
Wanna Splurge: Orka Cubes

Love these…same concept as above except the bottom of the ice cube tray is made of food-grade silicone.  Instead of twisting and fighting to get the cubes out, you just press the bottom and “pop” each cube goes.  And to boot, they come in super-cool bright colors. $10-$15 each.

On-The-Go

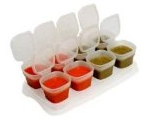
You spoon your baby food into these containers and the whole thing gets frozen.  No transferring, just take one out of the freezer, thaw it, and take it wherever you want.

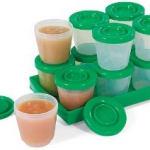
Value Pick: Fresh and Freeze

Easy to find and inexpensive.  These guys come with special trays to stack containers nicely in your freezer.  They come in a few sizes 1, 2, and 4 oz…don’t get the 1oz because your little one will outgrow in a month!  $10 for 12 containers.

Don’t Recommend: Baby Cubes

This is the only product on here that I don’t recommend buying.  Feedback is that the tops (while conveniently attached) are constantly popping off.  Green peas leaking in the diaper bag…enough said.

Food Grade Silicone

Moving up the scale, food-grade silicone is a great way to store food.  It’s safe for baby, flexible for easy removal, and is pretty much indestructible.

Value Pick: Tovolo Perfect Ice cube trays

A great silicone tray, and they form these perfect little squares of goodness.  The downside is that there is no cover, so use parchment paper or plastic wrap.  They’re easy to find in 1oz size, and a little harder to find in the 4oz larger size.  Use them also for regular ice cubes…they won’t melt for over an hour in your drink!  $8 each.

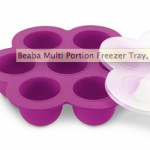
Wanna Splurge: Beaba Mulit-portion Freezer Tray

We’ve all seen them at Williams-Sonoma, and I must confess that even I lust a little after these because they’re just too cute.  Aside from the cool-factor, they’re crazy expensive so maybe it’s a great gift from mom or the in-laws! $20 each.

I’m hearing rumors that one of my fav brands Lifefactory is coming out with an individual silicone baby food storage container.  More to come on that, but something to look out for.

Freezing in Glass Containers

Even with BPA-free plastics out there, I try and use glass as much as possible.  The most important thing to remember about using glass: check to make sure your glass container is safe for the freezer…it will say on the packaging.
(Note: old baby food jars are NOT safe for the freezer, so toss them in the recycle bin and don’t be tempted to reuse).

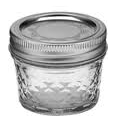
Value Pick: Ball 4oz Jelly Jars

The best kept secret…Whether your canning or not, these freezer-safe jelly jars are an excellent option to freeze baby food if glass is your preference.  I picked up a dozen for under $9.00 at my local Ace Hardware.

Wanna Splurge: Wean Cubes

My all-time fav splurge pick are these adorable glass baby food cubes from WeanGreen.  Definitely on the pricy side ($25-$30 for four, 4oz cubes), but again, what a great extravagant gift to have your mom buy!  $25 for 4 containers.

Come visit Little City Kitchen Co. at the Burlingame Farmers Market this Sunday…got some yummy flavors for the kiddos!